Using DiskPart to change read-only settings
You can use the Windows DiskPart command-line utility to enable or disable read-only mode on your USB flash drive.
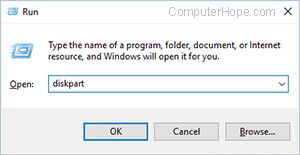
- Press Windows key+R to open the Run box. Type diskpart and press Enter.
- If you receive a User Account Control prompt asking for permission to continue, click Yes.
- At the DISKPART> prompt, type list disk and press Enter
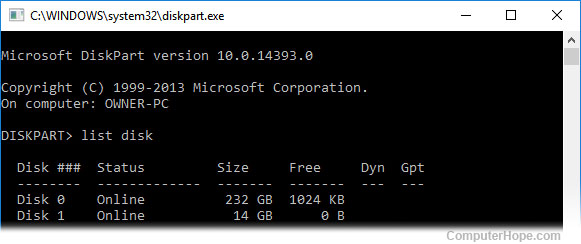
Use the disk size to determine which one is your USB flash drive. In this example, we know that Disk 1 is our USB flash drive because its size is 14 GB.
- Select your USB flash drive with the select disk command. In this example, we want to work with disk 1, so the command is select disk 1.

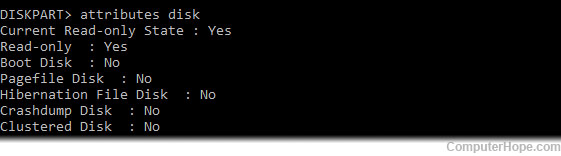
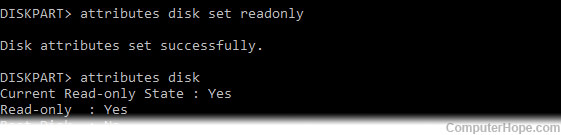
- You can list the attributes of the disk with the command attributes disk.
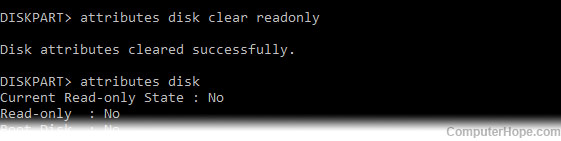
- To clear the read-only attribute (making the disk writable), use the command attributes disk clear readonly.
Or, to set the read-only attribute (making the flash disk write-protected), use the command attributes disk set readonly.
When you are finished, type exit to quit the program.
